Summary
The Choice activity lets you ask your students a single question – they can be useful as quick polls or to gauge progress.
Resources
- Choice activity (Moodle.org)
Creating a Choice
- Log in to Moodle and navigate to the course when you want to create the activity.
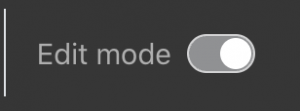
- Make sure editing is turned on (Turn editing on – toggle icon in the top right hand corner):

- Click Add an activity or resource in the section where you want the Choice activity to appear.
- Select Choice from the menu and click Add.
- Give your activity a name and decide if the options display vertically or horizontally (if you have a lot of options select vertically).
- Options – here you decide if a student can change their mind and update their answer, select more than one answer or limit the number of responses per option (this is useful if you’re using the options to pick groups). This is also where you add each option for students to pick in the activity.
- Results – decide if students should see the results or not.
- Restrict access – use this if you want only a certain set of students to take part in the Choice activity.
- Click Save and display to view your activity once you’re finished.
Viewing Choice Responses
- Log in to Moodle and navigate to the course when you want to create the activity.
- Make sure editing is turned on (Turn editing on – toggle icon in the top right hand corner).
- Click the name of your Choice activity to open it.
- Click the View x responses link to the right hand side of the page.
- Here you’ll see all the responses and be able to download the data for use in Excel (or similar programs).

