
Summary
Getting users in and out of Moodle courses is a useful feature and can be achieved in a couple of ways. Administrators are able to add and remove users from a course as long as they already have Moodle access, if not providing your ELF (eLearning Facilitator) with a list of users will get them created and added.
Resources
- New User template (xls spreadsheet)
Bulk adding new users to Moodle (or a Moodle course)
- Download the Upload New User template from above in the Resources section.
- Fill in the spreadsheet with all your users – the yellow fields are the ones you need to worry about. The first line is filled in as an example – you can delete it.
- course01 – the shortcode of the course you want to add the user to (some examples: 2017e2_PsyMedBlk or 2018w4_RADT401).
- username – this is the user’s University of Otago username.
- firstname – this is the user’s first name.
- lastname – this is the user’s last name.
- email – this is the user’s University of Otago email address.
- city – this is the user’s city (not compulsory).
- Save the spreadsheet.
- Email the spreadsheet to med.moodle@otago.ac.nz with your request.
Adding/removing existing users to a course
Note – not all users have the capability to add or remove users.
- Log into Moodle and navigate to your course.
- Select Participants from the top of your course (just below the course title).
- This will show you a list of all the users in your course and their roles (if you can’t see your users make sure Enrolled Users is selected from the drop down menu at the top left of the area).
- To add a user click Enrol users in the top right of the page.
- Search for a user (if you can’t find them check they are not already in the course, if they’re not in the course then they do not have a Moodle account and will need to be added by an eLearning Facilitator).
- Pick what role (level of access) you’re going to give them.
- Click Enrol selected user and cohorts.
- To remove a user click the rubbish bin icon at the far right of the screen associated with their name and details.
Add a role to an existing user in a course
Note – not all users have the capability to add or remove users.
- Log into Moodle and navigate to your course.
- Select Participants from the top of your course (just below the course title).
- This will show you a list of all the users in your course and their roles.
- Find the User, Click the pencil icon beside their role, select the role you wish to give them from the list.
- Now importantly, you need to save this – the ‘Save’ button it looks like a floppy disk.
View a list of staff enrolled in a course
- Log into Moodle and navigate to your course.
- Select Participants from the top of your course (just below the course title).
- In the filter box, select None, Roles and then enter both Student and Guest student. This will show us only people that are not students (i.e. staff).
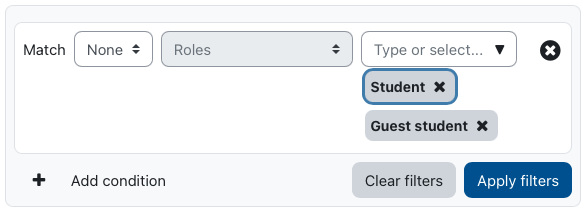
- Click Apply filters.
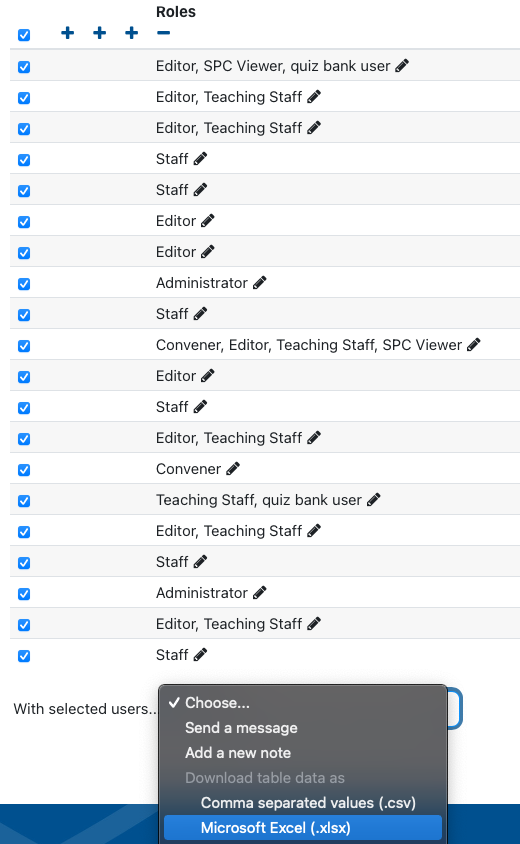
- Below you will now have a list of staff enrolled in your course.
- If desired you can export this as a spreadsheet:
- Select all staff with the topmost check box
- At the bottom in With selected users… select Download table data as > Microsoft Excel.
- Make sure to click Clear filters when you are finished.
