 ,
,
Please note, this page is currently in progress.
The quickest and easiest way to get up to speed on using Otago Capture is by watching the Video Tutorials for Instructors.
Dashboard:
The Dashboard lists all courses in which you are enrolled as an instructor. From your dashboard you’ll be able to easily jump to the previous or next class, see if students or other instructors have posted new questions, or see how many students have not watched the recording.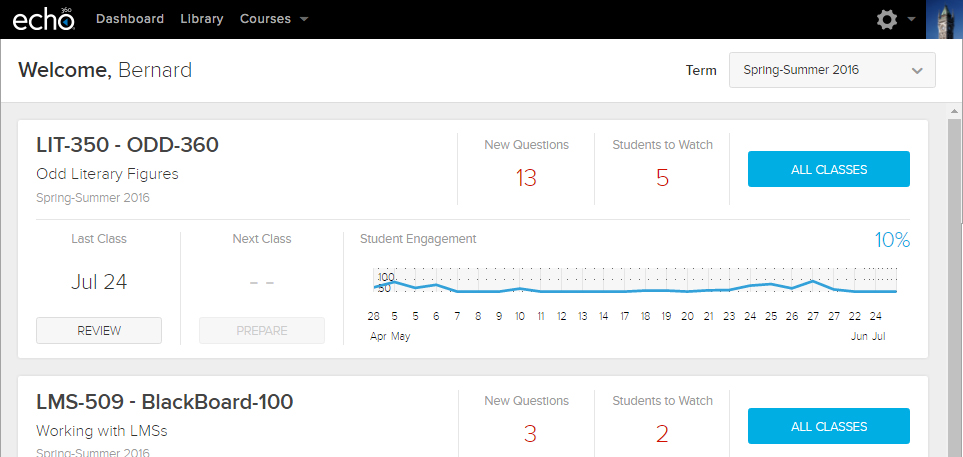
Courses & Classrooms:
When you navigate to a particular course, the Classes tab for the course appears by default. To enter the Classroom Player click on the class row of the class you wish to view.
The Classes list contains all future scheduled recordings, previously recorded lectures, slideshows, and any uploaded video content you upload. Each row is a different class. On this page you can create new classes, groups classes, change the order of classes in the list, edit class descriptions, or add content.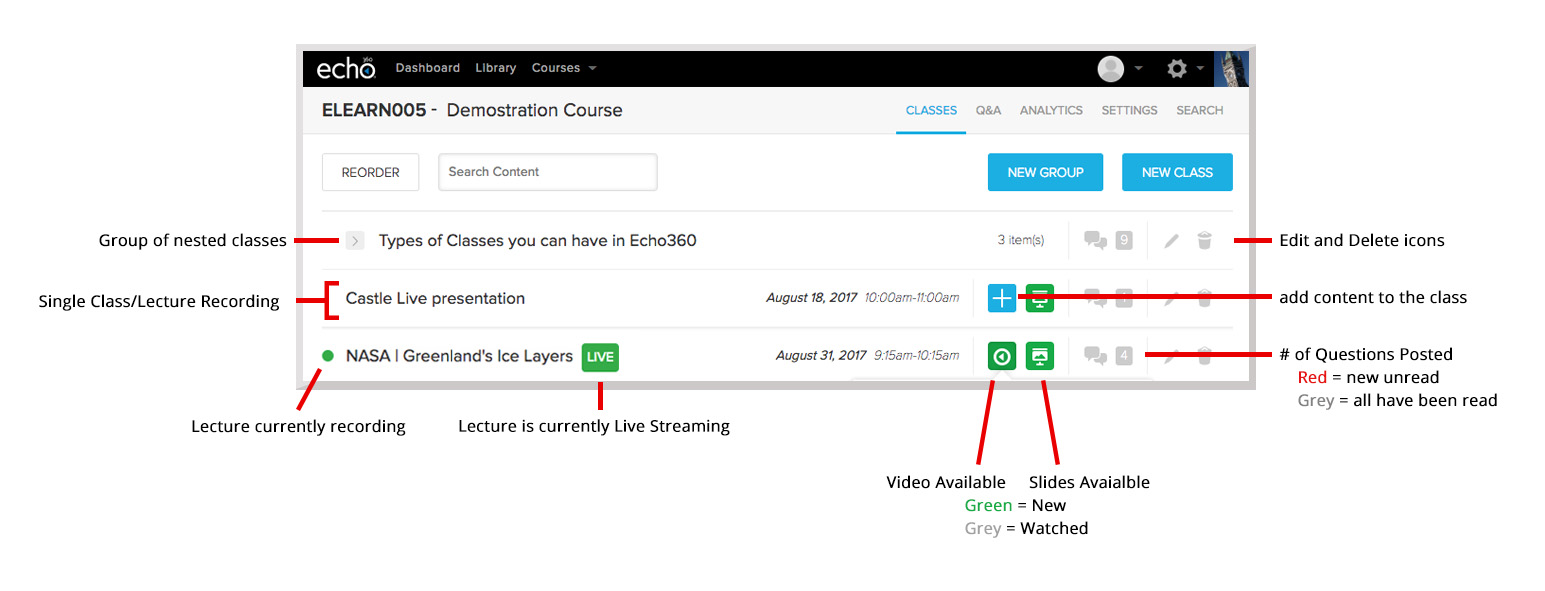 In the top right of this page you will also see other tabs to choose from:
- Q&A: This tab allows you to view discussions you and other students have started or responded to in the course. You can filter questions by lecture, all lectures, or general.
- Analytics: The Analytics tab provides information regarding student participation and engagement.
- Settings: In this tab you can enable or disable section content features.
- Search: This tab allows you to search this course's content and filter by content type and specific lectures.
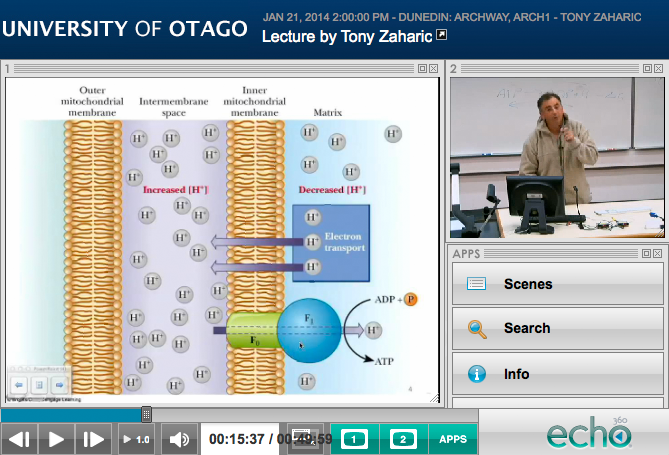
Classroom Player:
The Classroom Player allows you to view class content (recorded lectures and slides). Here students can take notes, create bookmarks, and ask questions. Instructors can also post discussions and respond.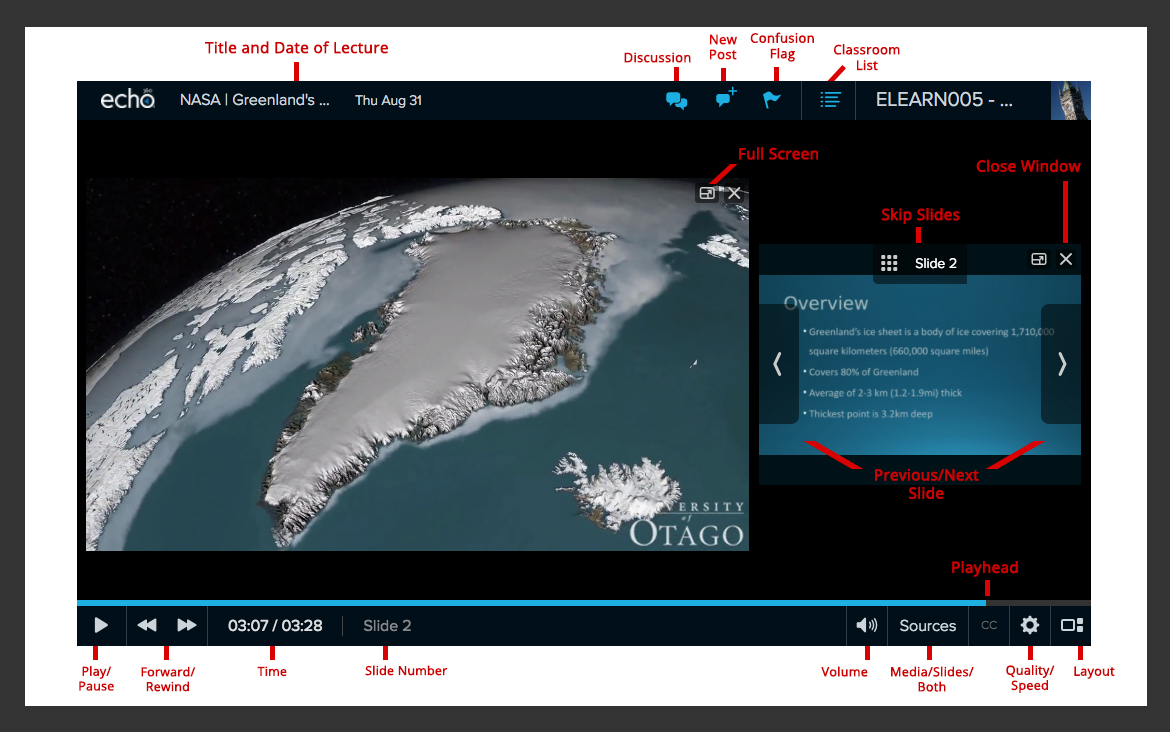
Library:
The library contains all media content you own and have access to publish to courses or share via embed links and email.Before the Lecture
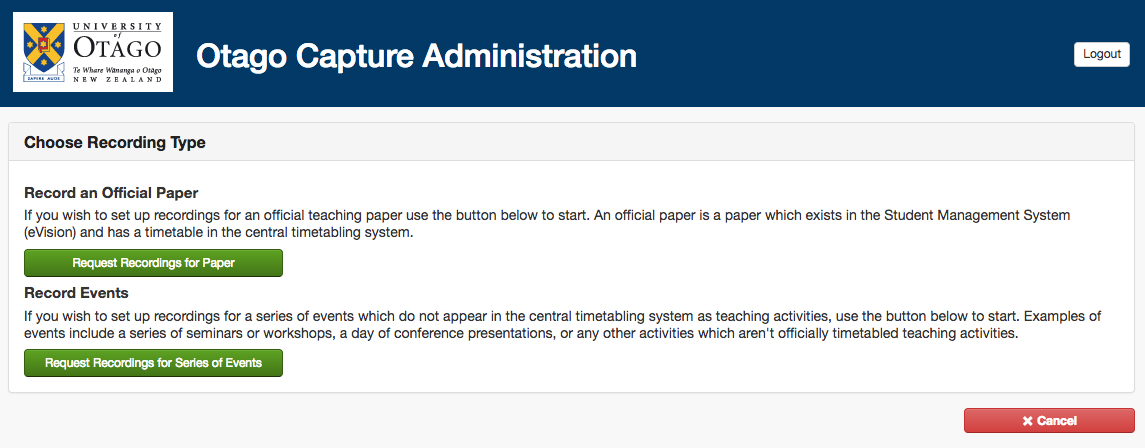
Use Otago Capture Administration Application (OCAA) to setup a section and details from your lecture recordings.
You can use Otago Capture Administration Application to request Sections for Official teaching papers or for Events (a seminar series or a teaching activity that doesn’t exist in the central timetable).
Official teaching papers are papers that have a presence in the SMS (eVision). To record sessions for this class your paper must be in rooms that are Otago Capture Capable (listed on the right of this page) and have activities scheduled through the central timetable system (Syllabus Plus).
Requests for new Otago Capture sections can be made via the web interface at http://corpapp.otago.ac.nz/capture
- Use the Request Recordings button to start your request.

- Choose if you want to make an Otago Capture section for an Official paper or an Event.

- Once you have made these selections you will be guided through the steps to provide the needed information to create a new Otago Capture Section, including ownership, availability, and what product group you would like recorded (screen/audio, screen/video/audio, or audio-only).

- Log into Blackboard and click on the name of the appropriate paper.
- In the Blackboard course menu, click the + icon in the top left hand corner. Choose to add a "Tool Link".
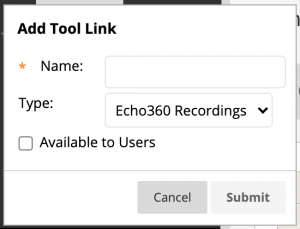
- Give the Link a name, and select the Type as "Echo360 Recordings".
- Now Click on the link in the Course Menu to attach that link to the section.
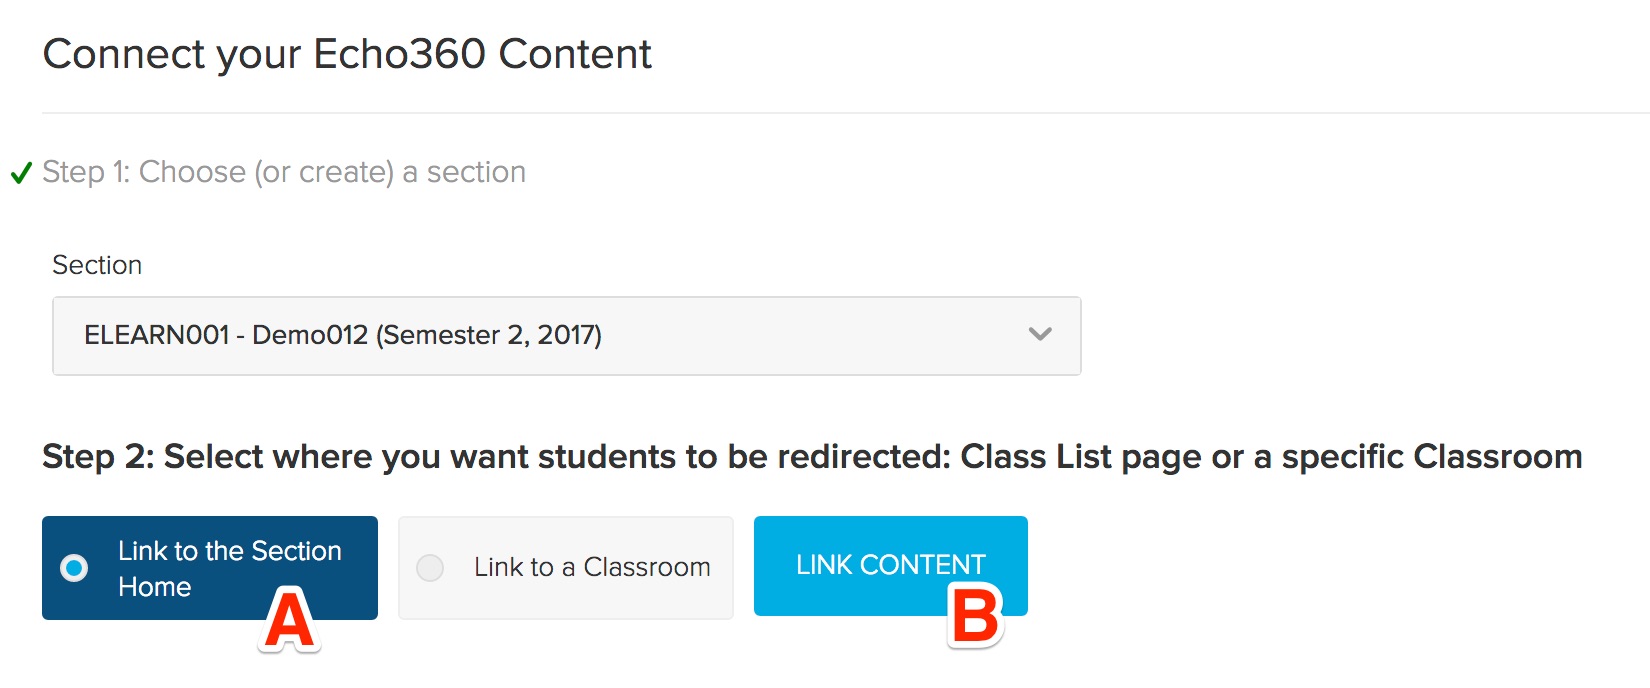
- A new window should open, from here select the section you wish to join to the Blackboard paper.

- Choose "Link to the Section Home"
- Click "Link Content"
- Close the window and try clicking the link again, the section should open up for you.

You can upload your lecture PowerPoint slideshow to your class, before or after the lecture. Uploading the slides before lecture allows students to follow-along and take notes while attending the lecture.
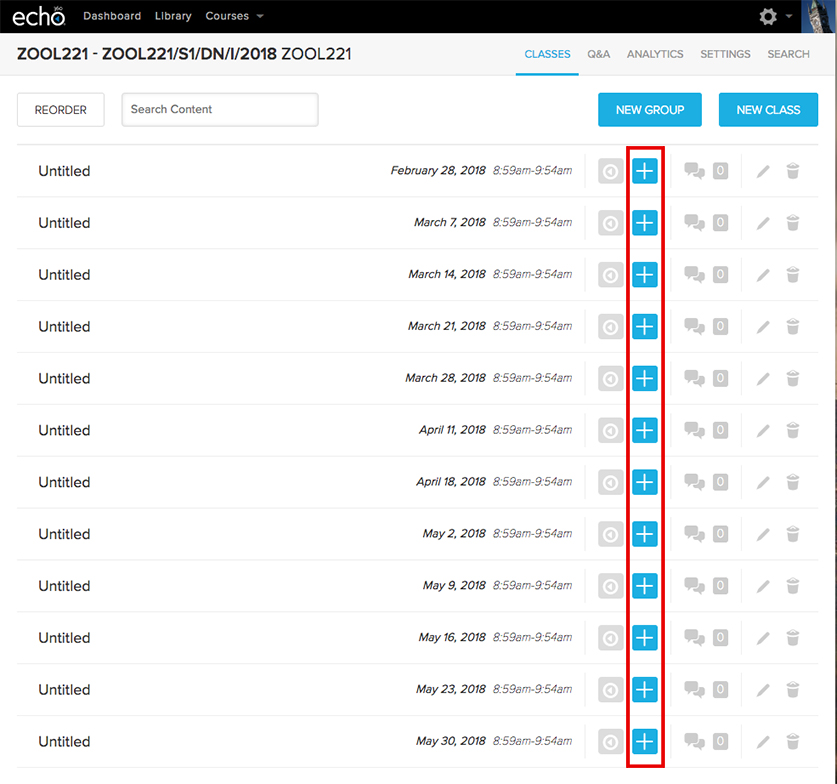
To upload a slideshow, go to your class list for your course on Otago Capture. From here you can either attach the slideshow to an existing class schedule or recording or create a New Class from the top-right button marked New Class. Once you have found the class you want to upload the slideshow to, choose the + icon in the corresponding row.
 A pop-up will appear and ask you how you want to add the presentation. You have the option of uploading a new file, importing from your Library, or creating a new presentation using Otago Capture.
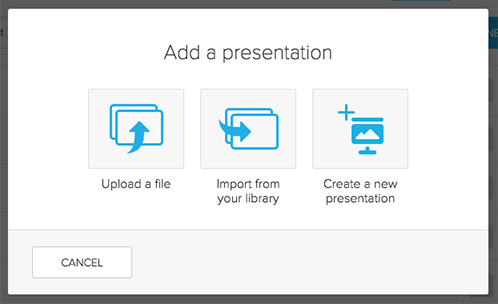
Related Pages
After the Lecture
Email notifications are currently turned off due to a bug in the system. After your lecture has been recorded, it will be uploaded to the cloud and processed. If you are the Course Owner, you will receive an email notifying you that the recording has been processed and is available. You will be able to turn this e-mail notification on or off through OCAA .
Example of a notification email.
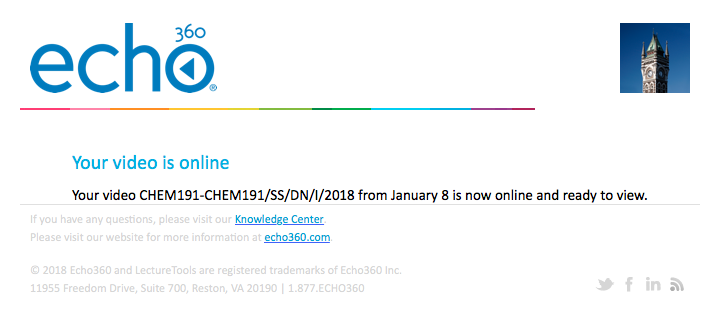
This email does not include a link to the recording or to the section. Instead you'll need to log in to https://echo360.org.au/ or access the recording through your Blackboard paper.
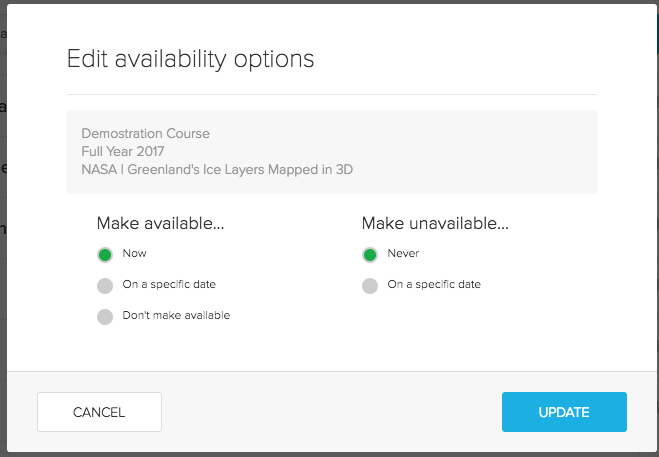
Your recordings will be available to your students if you have made lecture recordings initially available within OCAA. You can also edit availability of individual lecture recordings or slides within Otago Capture. Simply, click on the media icon you wish to change the availability for and select either Make Unavailable or Availability Settings. From the latter you can turn availability on/off or limit to specific dates.
Related Pages
Content owners are able to edit media details including Title, Description, and Tags. This includes details of all content items: video, audio, or slideshows.
From the classroom list, click the icon of the media you want to edit. If you want to edit just the description, title, or tags, choose Edit Description. To edit the video, choose Edit Video.
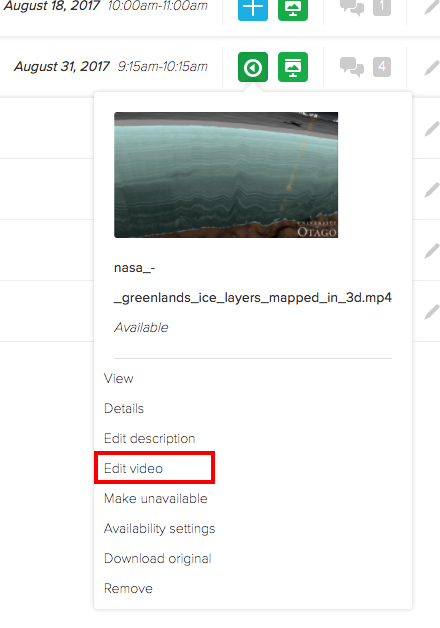
*NOTE: Choosing Edit Video will also allow you to edit Audio Only files.
*NOTE: Any changes to a piece of media will apply to all published and shared versions on Otago Capture.
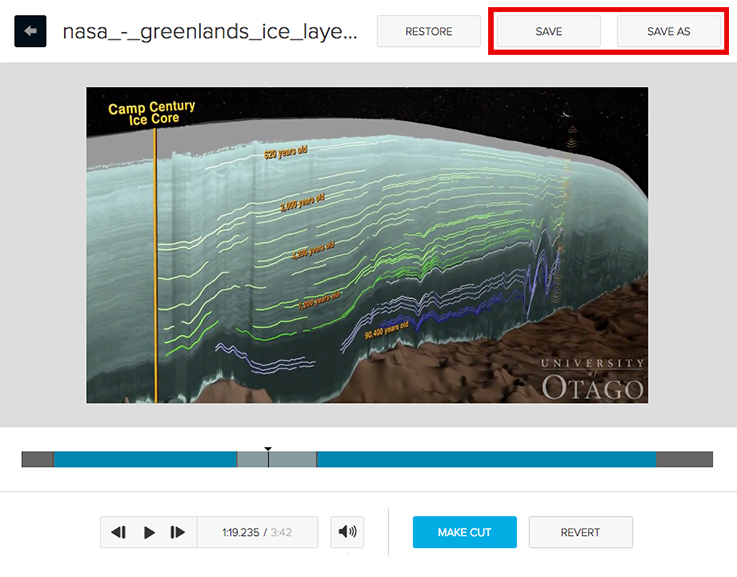
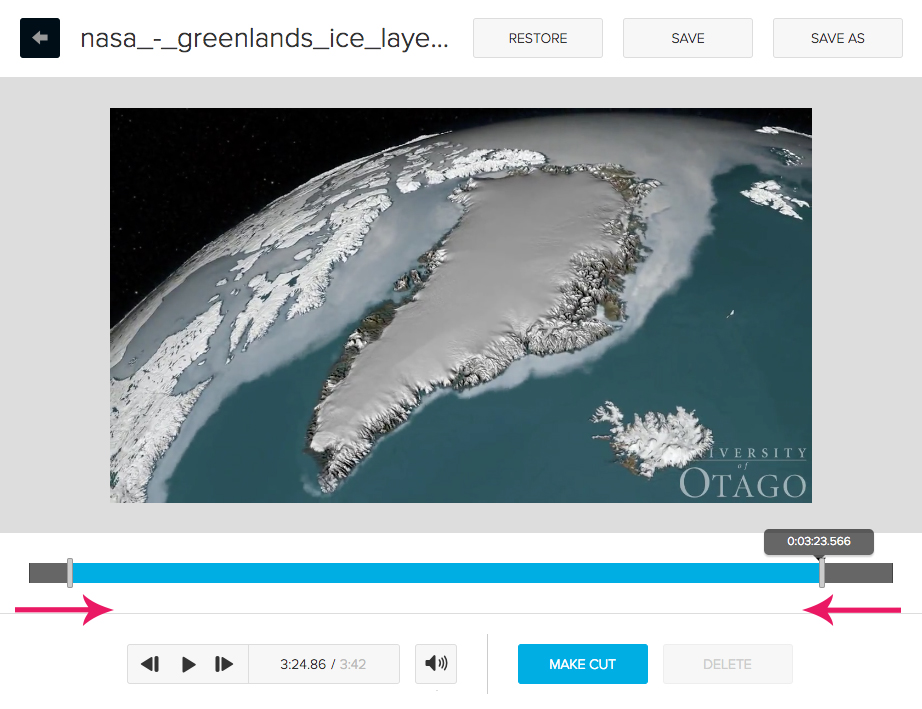
Trim
To trim the beginning or end of your video, hover over the timeline (bright blue bar across the screen). Two grey bars will appear at the beginning and end of the timeline. Click and drag the bars to the places on the timeline where you would like the media to begin and end.
Remove segment
- To cut a segment out of the video, place the video playhead where you would like the beginning of the cut to begin. Click Make Cut.
- Move the playhead to where you would like the end of the cut. Click Make Cut.
- You can adjust the beginning and end of these cuts by clicking and dragging the handles that appear.
- To remove the segment, be sure it is selected and choose Delete. The segment will turn grey to indicate it has been deleted.

Undo
To undo a deleted segment of the video – put the playhead over the cut segment and the Delete button will change into a Revert button. Click this and any changes made will be undone.
*NOTE: Even after saving, you can come back to your edited video and choose Restore to revert to the original.
Saving
To save your edits, choose Save to overwrite your current file or Save As to save an edited copy. If you save copy, it is essentially a new video, and will need to be published to a class. Once you have saved your edits, the video will process.